How to deliver an effective email marketing campaign
In the second part of our email marketing series we cover how to deliver your email marketing campaign…
Well firstly, you are going to need an ESP (Email Service Provider) to do the sending on your behalf. Why can’t I just blind copy everyone into an email and send from my own email address?
Ha! Well you could do that but I’ll give you a few reasons why that would be more than just a bad idea and a link to even more reasons why that would be a really bad idea:
- If you send too many emails from your own computer, your ISP may think you’re a spammer and will most likely eventually block (blacklist) you.
- YOU get all the bounce backs and auto replies, and you get to enjoy sorting them out from all the other email you are dealing with. Things like “Hard Bounces” (bad/incorrect addresses) need to be removed from your list effectively or your email address is likely to be blacklisted by your ISP if you keep sending to those addresses.
- You won’t really know if anyone is reading your emails! Outlook and other basic desktop email applications don’t come with any tracking tools to show you how many people opened and clicked on elements in your campaigns. How can you gauge the effectiveness of your email marketing if you don’t know what people are doing when they get your emails?
Ok, so we now know that doing a “blast” email from my own computer is a bad idea – Who can do it for me?
Well that’s where the role of an ESP (Email Service Provider) comes in and I’m not going to lie to you, there are LOADS! Just take a look at this list and it’s enough to make you cry – How do you pick someone? It’s like trying to pick a plumber out of the Yellow Pages (if you aren’t under the age of 50) and just feels like pot luck!
Well, whilst there are lots of options out there of varying pricing and functionality, if you are just starting out, I can’t recommend Mailchimp enough. Not only is it simple to use with great drag and drop functionality, but it is 100% FREE if your subscriber list is less than 2000 and you aren’t ready to send more than 12,000 emails per month. What you don’t get with the Entrepreneur Account (that’s what the free version is called by the way) is a number of the very clever features such as Automation Flows that the paid service comes with but you can upgrade for as little as $10 per month and get full access to these features which is what makes Mailchimp a great place to dip your toe into the email marketing pool.
For the level of functionality you get with a paid Mailchimp account, the pricing really is very modest, just check it out below:
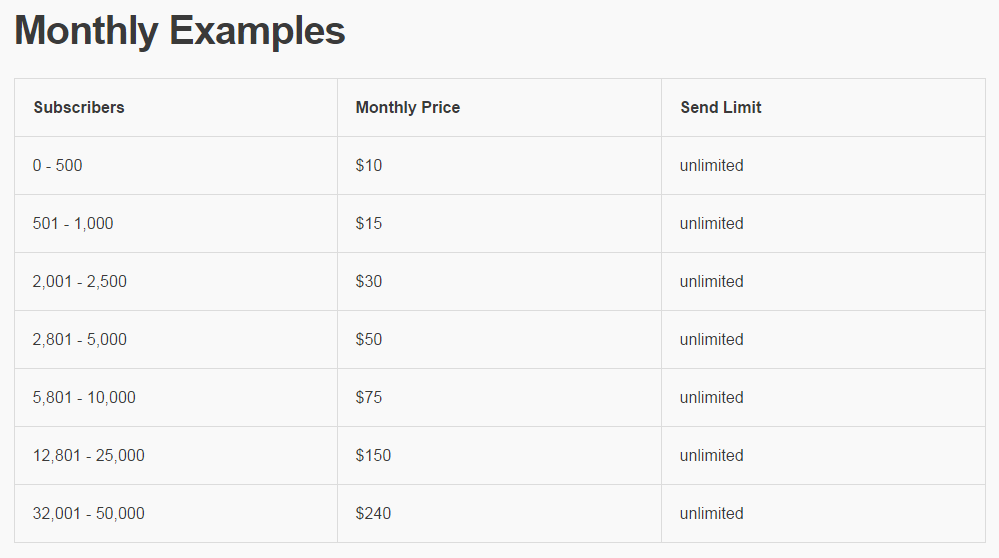
Full Mailchimp prices can be seen here
Ok, so we’ve now got someone to send all our emails for us and take on all the risk so we don’t have to, and they will even provide us with tracking tools to gauge the effectiveness of our email marketing campaign.
Let’s get sending and make some money!
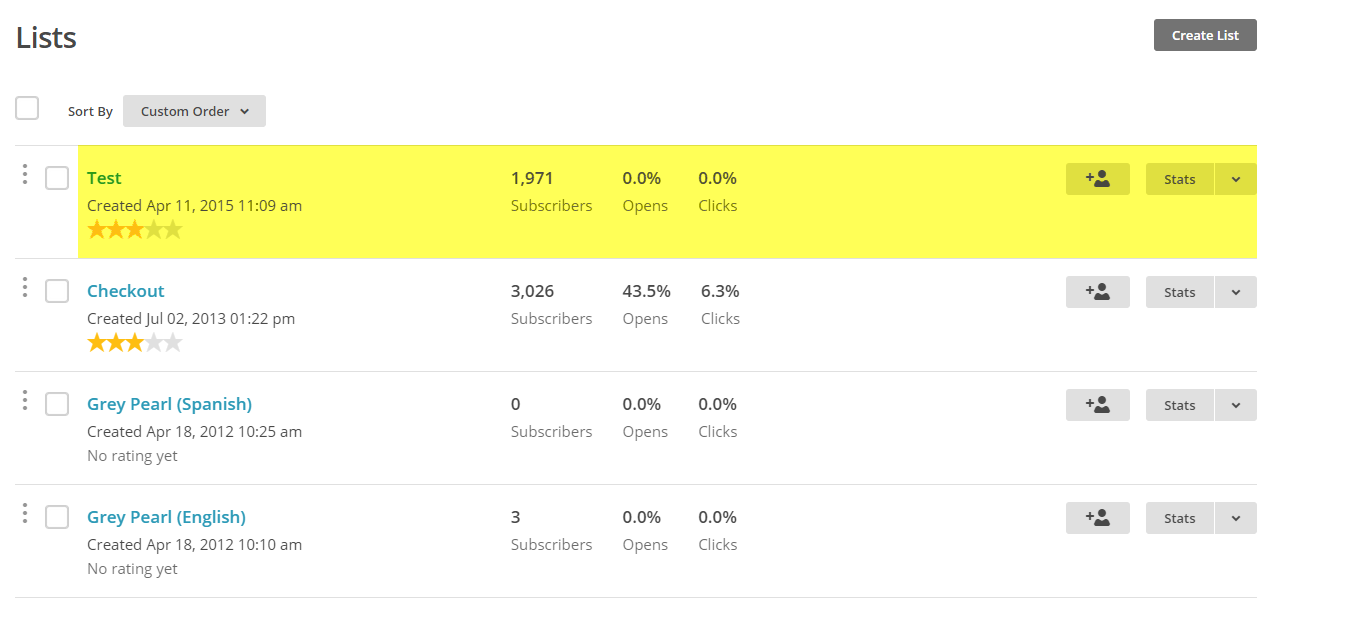
If you are using Mailchimp for the first time, your first major task after going through all the usual account setting setup will be to create a new list – You need people to email right?
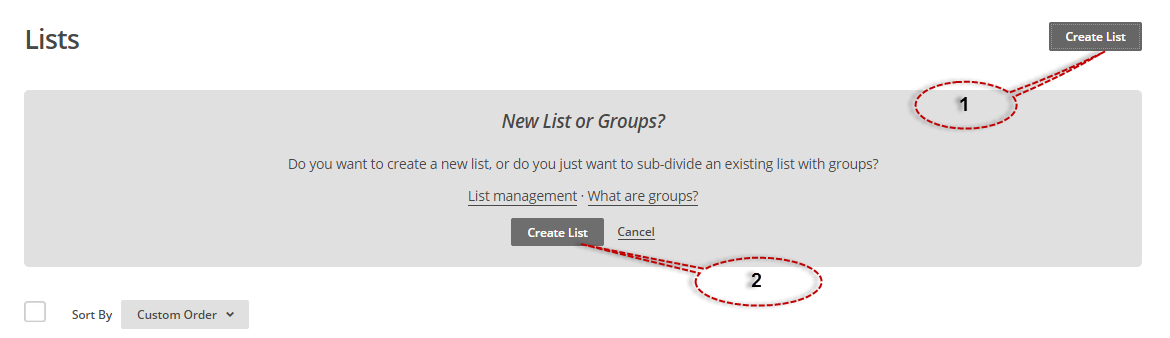
Click on “Create List” and then “Create List” lower down to create a brand new list and fill in the details requested as shown below:
When picking a list name, pick something appropriate that is not going to cause offence or ill feeling – Your email recipients see this in the email so calling it “Email list bought from dodgy Dave” or “chumps who paid way over the odds on my last product” is probably definitely not a good idea.
“From Email” should be your standard info@yourdomain.com email address whilst “From Name” should be your company name.
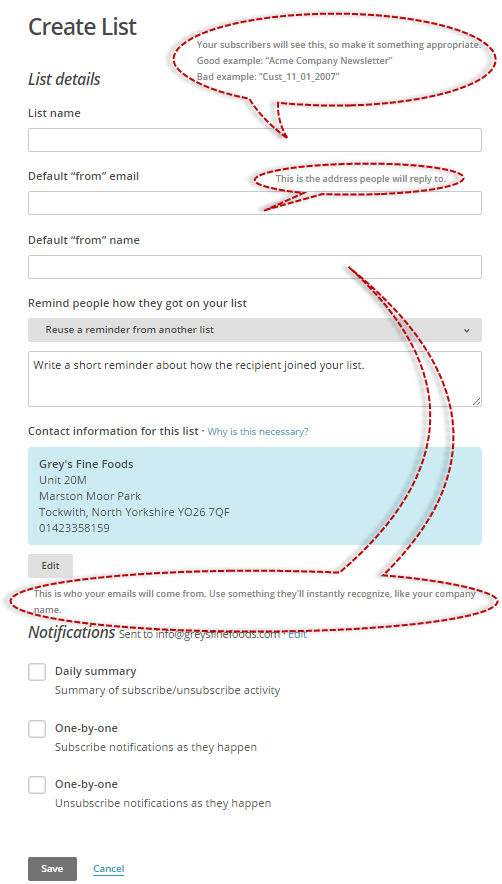
You will also need to write a short reminder of how the recipient joined your mailing list and so something along the lines of “You are receiving this email because you opted in at our website…” or “We send special offers to customers who opted in at ….”
Basically, something that politely reminds them that they consented to receiving emails from you at some point.
Note:
If you send emails to people who did not consent to being on your mailing list, you are at risk of your recipients reporting your emails as Spam through an Abuse Report to mailchimp. You must avoid this as much as possible as Mailchimp uses a threshold trigger whereby their compliance team measure abuse percentages when disabling accounts due to abuse complaints is actually based on the industry average which is about 1 complaint per 1,000 recipients. So while the overall percentage is low in the grand scheme of things, higher than 1 complaint per 1,000 subscribers would be over the average for the ESP industry.
You should also be aware of other signals that could trigger a spam filter which Mailchimp does a fine job of breaking down here
Now that you’ve created your list, you need some email addresses in it. Perhaps you’ve already got a list of email addresses exported from your e-commerce/lead gen CMS in TXT or CSV format which is just great, as that’s what we need for our new list because we are going to import that list into Mailchimp.
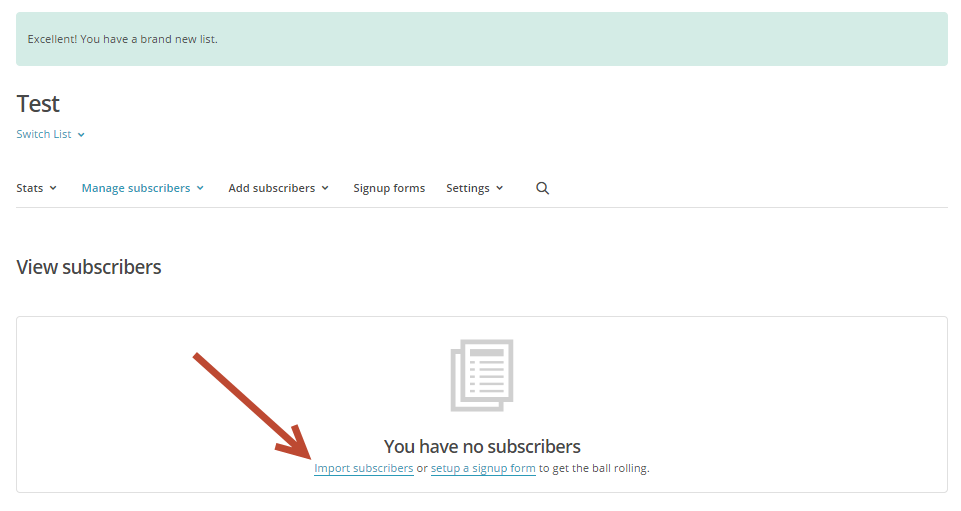
Let’s say you’ve exported all of your past customers from your CMS into a CSV or TXT file. Click on “Import Subscribers”
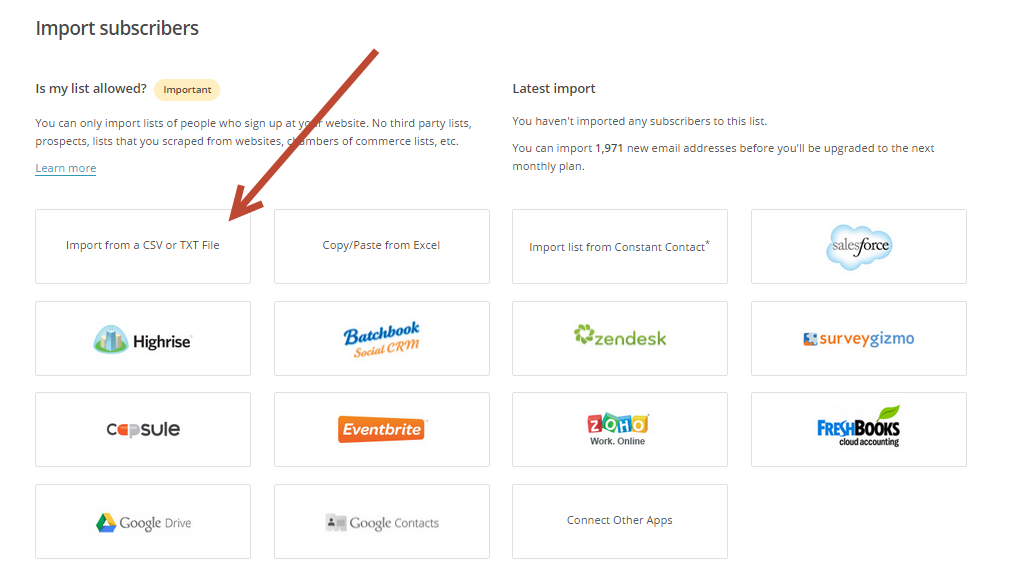
Then on “Import from a CSV or TXT file (you will find other options here for importing a list also)
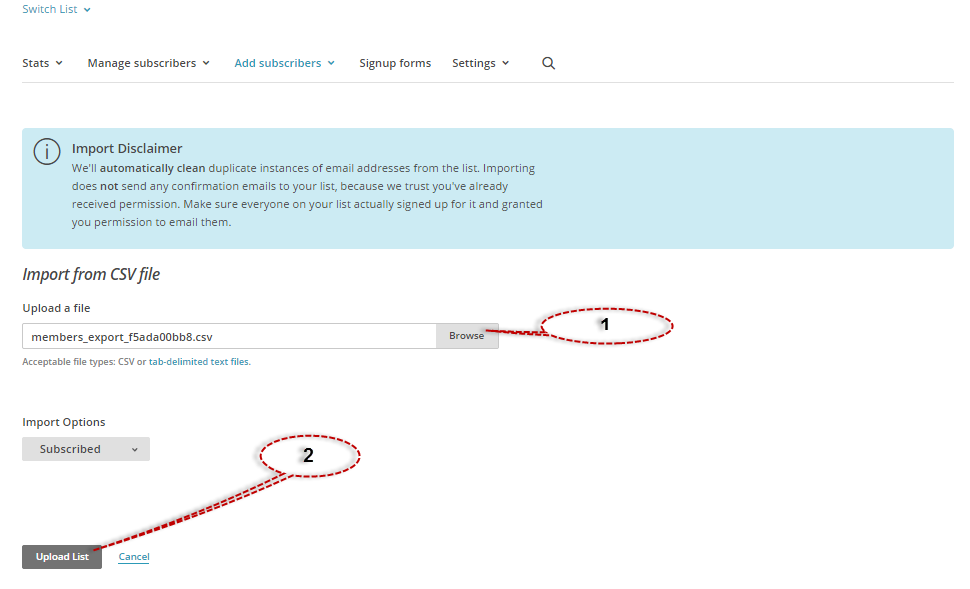
Browse to your CSV or TXT file and the click “Upload List”
The next screen might look a little daunting but all it is asking you to do is help it marry up the column headings in your exported list to the column headings Mailchimp uses. For example, your column that contains the customer’s first name might be called “Christian Name” which Mailchimp knows as “First name”, so you just have to give it a little help where necessary to understand what data is in each of the columns in your exported list that you are about to import:
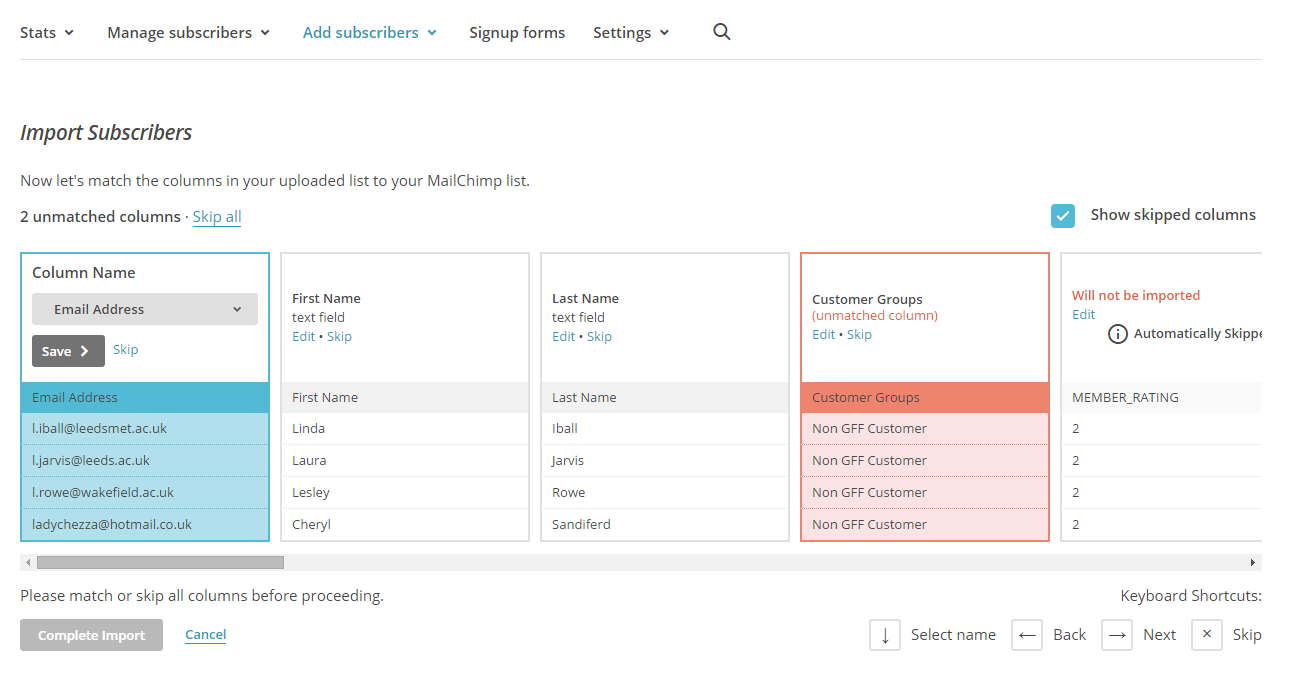
Once you are done matching up the columns in your list to your Mailchimp list, click “Complete Import” and Mailchimp will begin importing your contacts.
Ta Da!
Now it’s time to create an email to send out. The great thing about Mailchimp is that it’s got a load of pre-built ready to use templates so all you have to do is upload the imagery you want to use and type out the copy you want to include in your messaging, whether that’s for a limited 10% off offer, news of a new blog article or whatever. You don’t need any coding knowledge to send out professional looking emails.
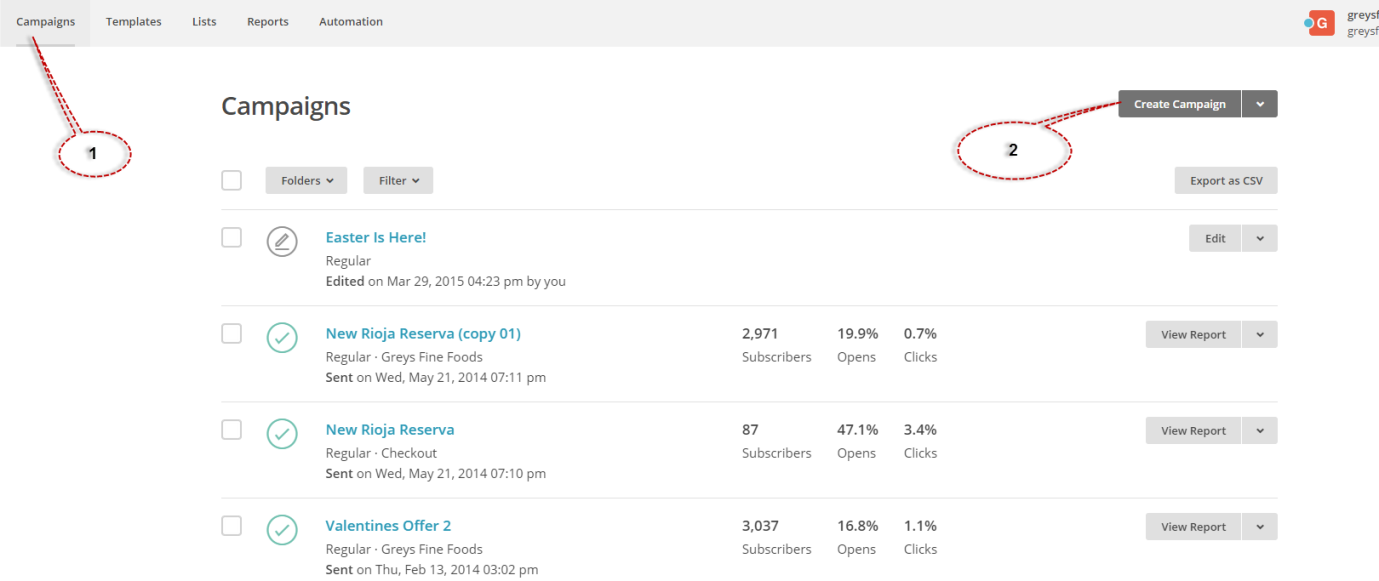
So, first thing we need to do is create a campaign which we do by clicking on the upper left “Campaign Link” followed by “Create Campaign”
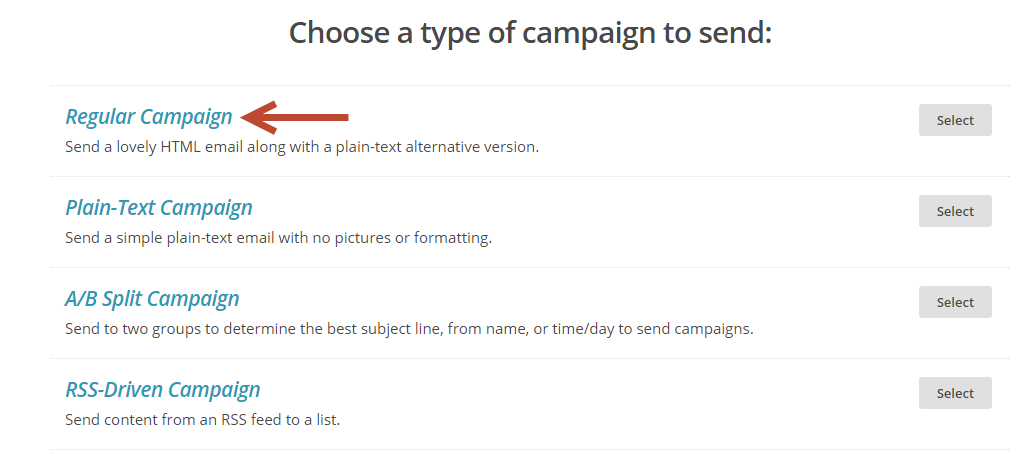
There are a few options here that we won’t go into right now, all you need to do is pick “Regular Campaign”
Then you need to pick the list to which you will send your emails to which in this case is the one you just created from your import:
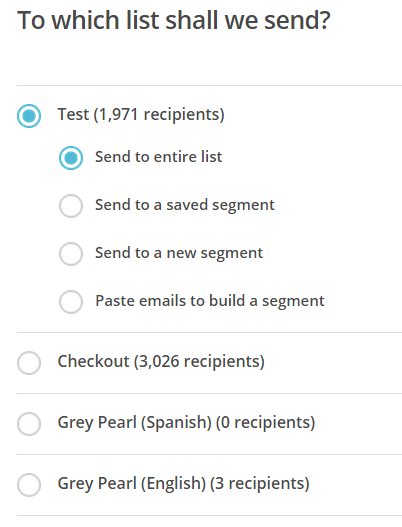
You have a few options here but for the purposes of this article, select “Send to entire list”. We will cover the power of email segments in a later article 
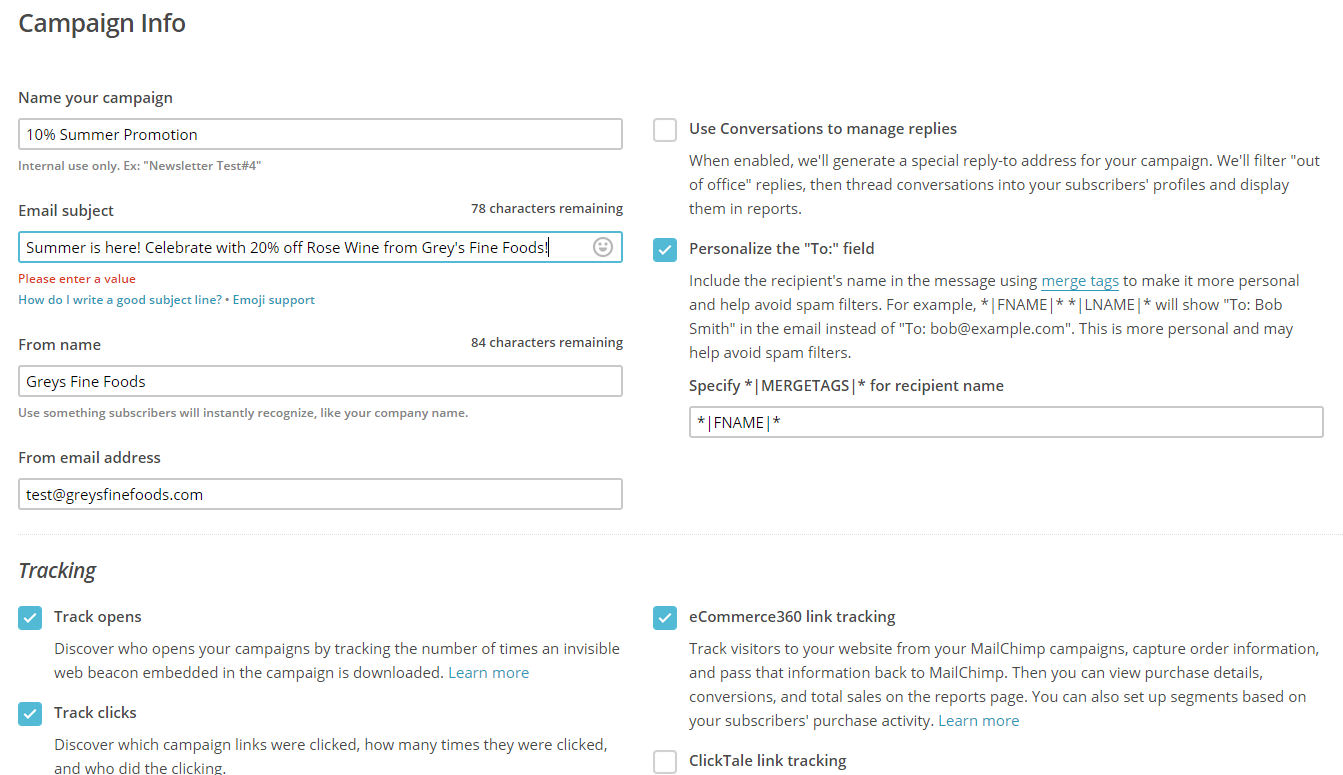
Click “Next” in the lower right hand corner of the screen and you will be greeted with the “Campaign Info” screen. Here is where you will enter key details about the email you are sending including the name of the campaign, the email subject line, which the email will appear to come from and their email address. There are a few other options here but we will leave them set to their default settings for this time.
A Note on Subject Titles
One of the quickest ways to ensure your email gets marked as spam or deleted without even being opened is a poor email subject line. You must remember that your email subject line is the very first impression you have on the recipient in a very busy inbox. You want to ensure that your email subject line stands out from the others and makes them want to open it, read it and click on the links in it.
Whilst best practice tips could be an in-depth article in its own right (and will be in one of our future email marketing articles), here are some basics you really should keep in mind when constructing your email subject lines.
- Keep It Short
MailChimp conducted an email subject line study and found that short, descriptive subject lines fare better than longer more ambiguous ones. You should try and keep your subject line to fewer than 50 characters, 60 max as subject lines with less than 50 characters have higher open rates and click-through-rates than those with 50+. Go over 50 characters and you risk being cut o-.
That means you want to eliminate filler words that eat into that critical 50 character count. Words like “hello,” “nice to meet you,” and “thanks,” which can easily be included in the email’s body.
- Make It Personal
Where possible, include the name of the recipient in the subject line. Personalising subject titles to the recipient creates a sense of rapport, makes the recipient feel that the content of the email will also be personalised to them and therefore likely to be more relevant and interesting which ultimately increases the chance of the email being opened.
Also try using You/Your wording to speak directly and comfortably with readers.
- Be Human, Not A Robot
Put yourself in the “From” field. “Colin Docherty from domain.co.uk” is a lot more welcoming, personal, human and likely to get opened than donotreply@domain.co.uk for example.
- Don’t Forget About the Preview Line
The email preview that follows the subject line is a valuable piece of property and can contribute to making or breaking someone opening your email. ASOS do a great job of their Preview Line by using it amplify the messaging of the main subject line:
Good
![]()
Bad
![]()
Once you are done, it’s time to click “Next Again” in the lower right hand corner and move onto the “Select a Template Screen”
Now, you have loads of options here whether its picking from one of Mailchimp’s ready to use drag and drop templates or, if you or someone you know has HTML and CSS coding experience, you can code up your own design to get much greater control of the presentation of your email template:
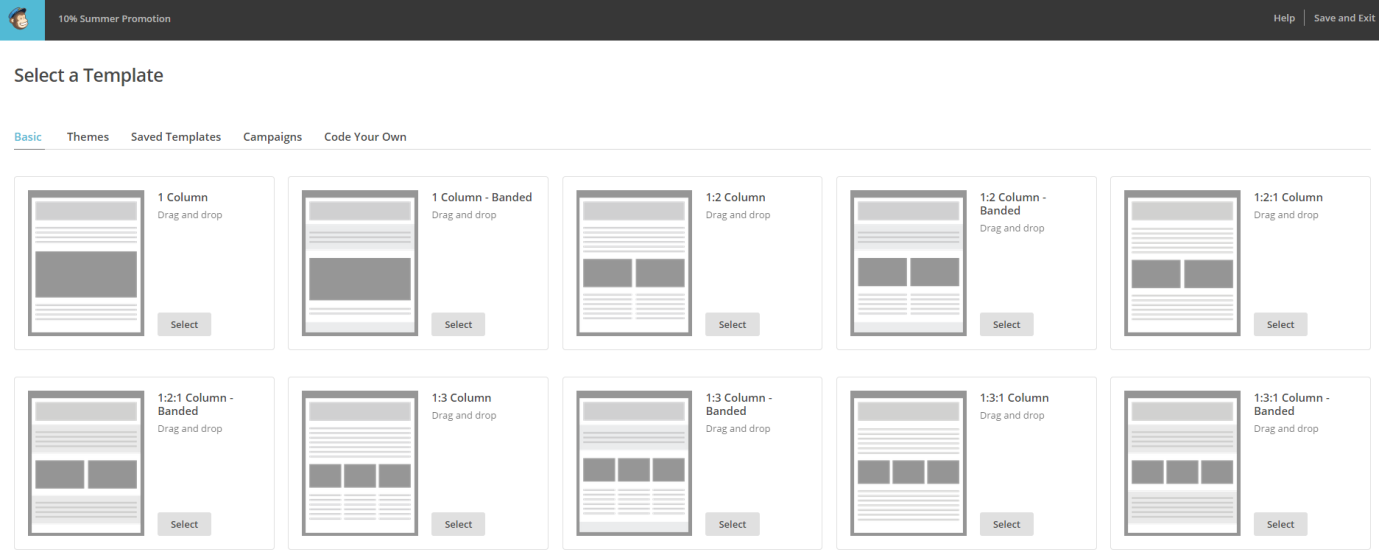
If you are starting out for the first time, I’d recommend picking a template that you like the look of and using Mailchimp’s drag and drop builder to create something that looks good:
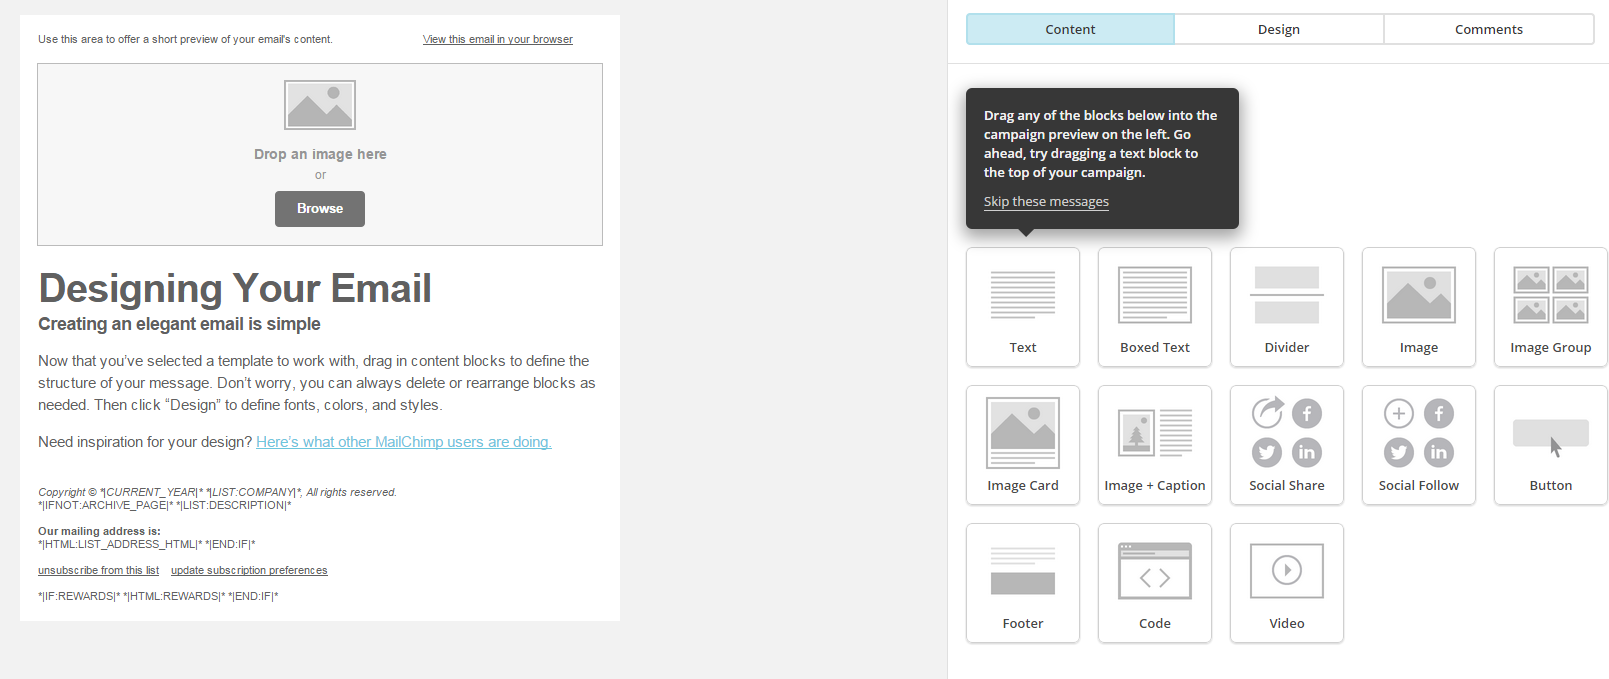
Whilst I am no designer or HTML/CSS guru, in 5 minutes I was able to create this with no coding at all:
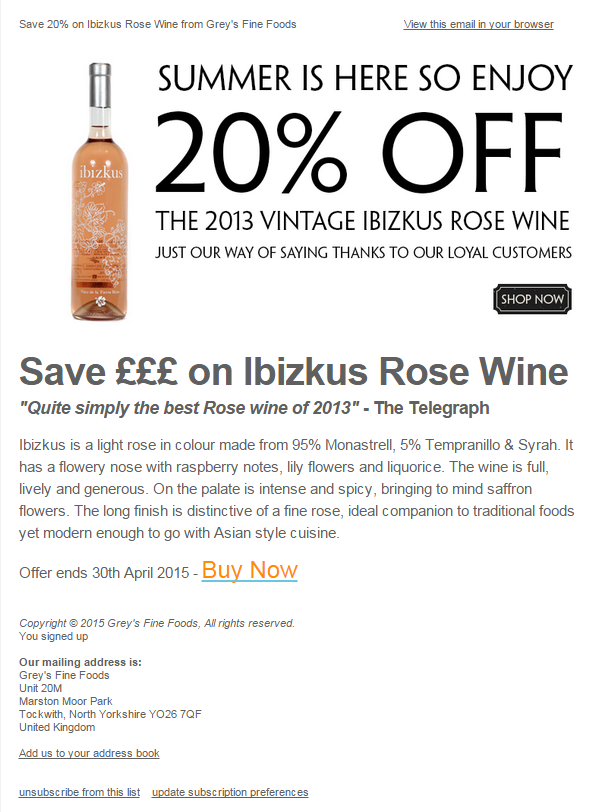
Figure 1 – Thanks to Grey’s Fine Foods for this Mailchimp example
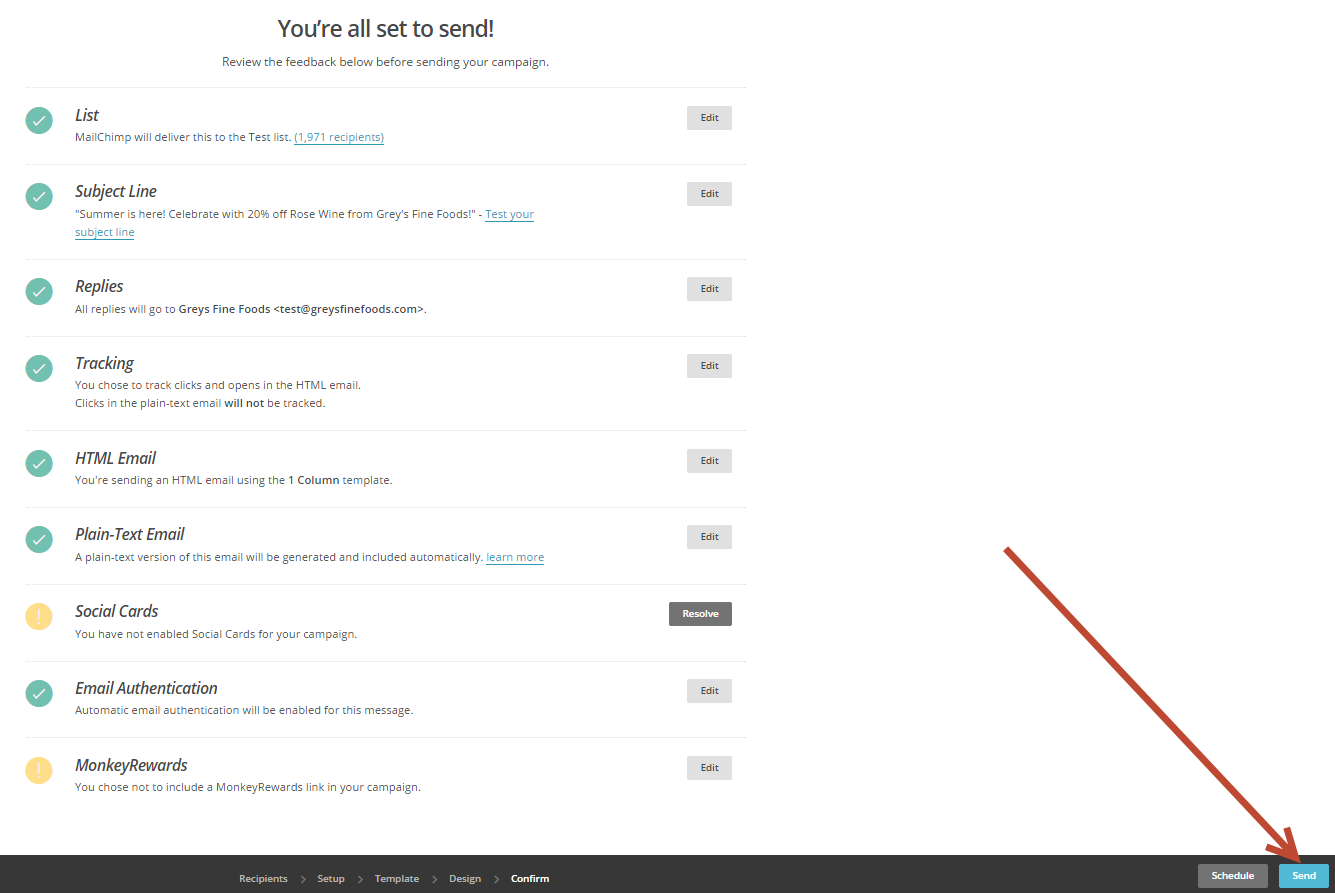
Once you’re happy with the look and messaging of your email, it’s time to hit send in the lower right hand corner and that’s it, Mailchimp will start sending out your newly created email to the people on the list you imported! If you’re not ready to send it right there and then, or want to time the email to be delivered at a time when you think most people are going to read the email, you can hit the “Schedule” button which will allow you to pick a day and time for the email to go out. In the case of our Ibizkus wine example, we want to wait until a weekend when we know the weather is going to be good and send the email out on a Wednesday prior to that weekend to give people enough time to order and receive the wine before the weekend of sun arrives!
Once the email is sent, you should see traffic coming to your website over the next few days from the email within your Google Analytics account and hopefully some sales (if you are an e-commerce company) or leads (if your business comes from Lead Generation).
You also get to see some good statistics from within the Mail Chimp report section for each of your campaigns:
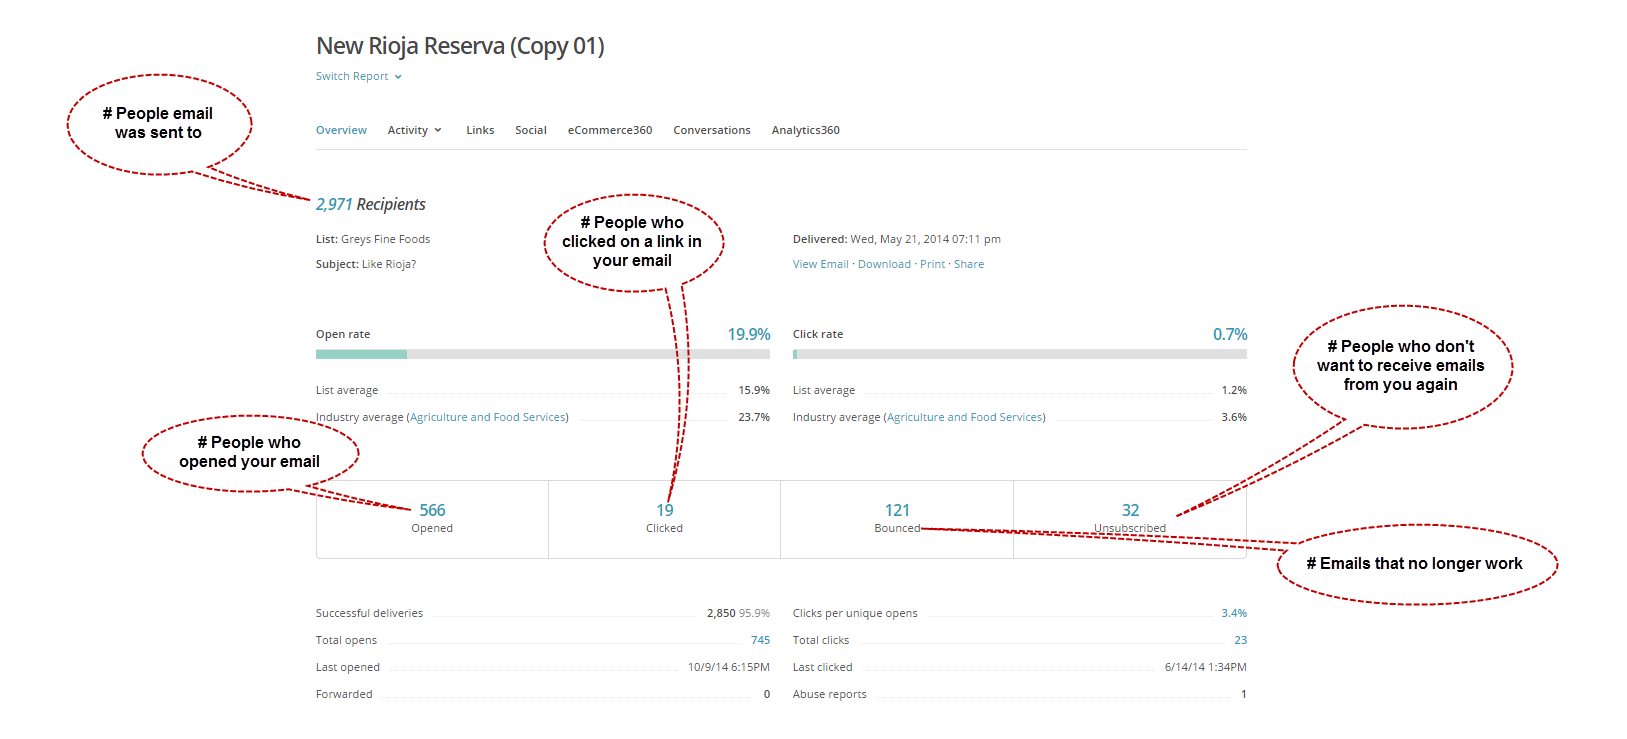
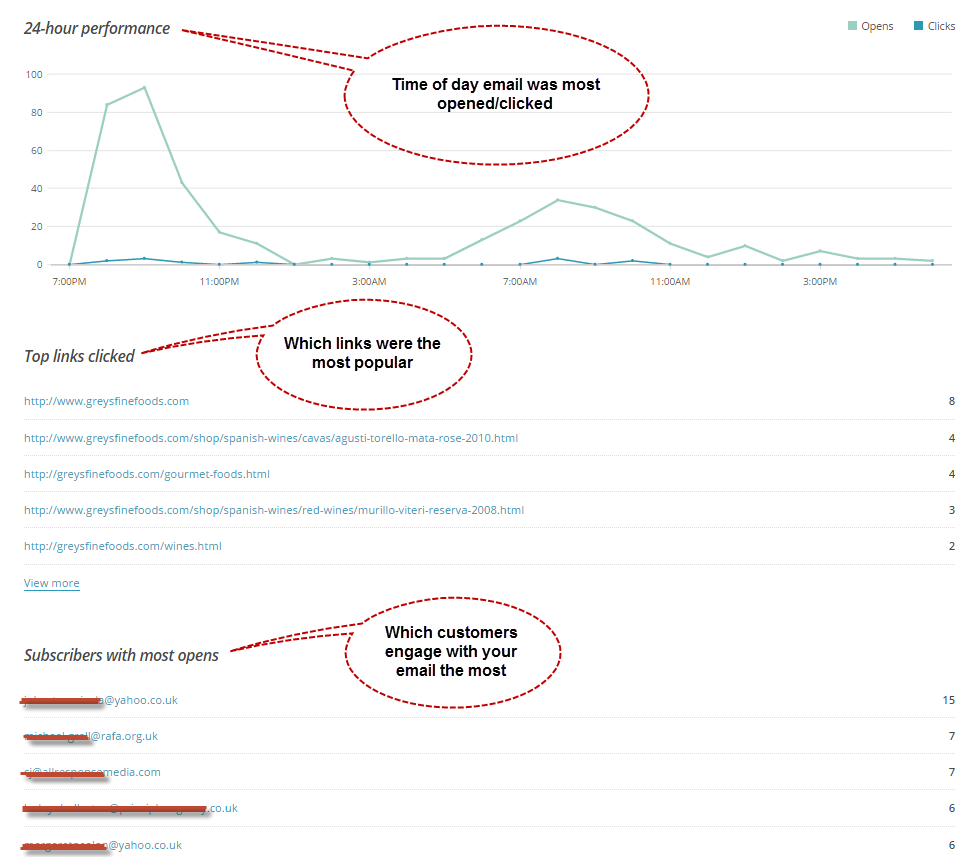
All of this reporting information (and more) should be used to measure the success of your email marketing campaign and help you to tailor future campaigns to be even more successful.
We’ve covered only the very basics of email marketing in this article. In our next article, we will begin to look at some methods of how to grow your email marketing list from Auto Responders to Newsletter Signup Forms.
Duncan Colman